Tag Archives: baked turkey legs in oven

  • 0

Secretly Healthy Black Bean Delicious chocolate Protein Truffles gluten free, vegan, healthy

Tags : 

Hi! I emerged down with small cold yesterday, so I couldn’t finish writing this recipe. But I chugged NyQuil and ate cough drops like candy so now i am feeling far better. I even went on a 14 mile bicycle ride this morning. Yay.

I have to let you know that my biggest goal has gone to blog on a far more frequent basis, thus I spent this past weekend developing three new quality recipes. And of course, pumpkin season can be coming… you know what that means. PUMPKIN EVERYTHING. Have you been excited? I am.

But initial, some healthy truffles for you.

Yes! The black beans are back again. They’re concealing in these fudgy delicious chocolate bites. And they’re AWESOME.

Ummmm do not stare at the screen like this. Don’t question the deliciousness! They are addicting! In all seriousness, if you liked my black bean brownies or my chickpea blondies , after that I’m sure you’ll LOVE these.

Have a look at this fun video We made:

Great tasting truffles dipped in chocolate. And perhaps some sprinkles, too? CHOMP CHOMP.

Chat quickly! xoxo

Ingredients

1- 15 oz can low-sodium or no salt added organic black coffee beans, rinsed and drained, and patted dry

1 scoop chocolate protein powder of choice (can use vegan if desired)

1 1/2 tablespoons coconut oil, plus 1 teaspoon for chocolates coating

2 tablespoons pure maple syrup

5 tablespoons good-quality unsweetened cocoa powder

3.5 oz top quality chocolate, chopped (vegan, if desired)

Toppings, if desired: sprinkles, flaked coconut, and/or chopped nuts

Instructions

Place black coffee beans, 1 1/2 tablespoons coconut essential oil, and maple syrup in huge bowl of food processor; process until very clean in consistency. You may want to scrap down the edges. Slowly add in cocoa natural powder and chocolate protein powder (if desired). Flavor and add more cocoa powder if required.

In the event that you decide not to add in proteins powder, simply replace with about 3 more tablespoons of cocoa natural powder or until batter tastes chocolaty a sufficient amount of to your liking.

Place truffle batter in refrigerator for approximately 20 a few minutes. After 20 a few minutes, remove from fridge and form batter into 12 even dough balls; roll them with your hands like you would roll a sugar cookie. A suggestion: You can use latex gloves unless you want messy hands! Place truffles baking sheet lined with parchment paper and place back fridge when you make chocolate coating.

Heat delicious chocolate and 1 teaspoon coconut oil in small saucepan on very low. Stir once in awhile until chocolate offers melted and is easy. Remove from high temperature. Coat each truffle in chocolates with a fork or toothpick (they don’t really have to be ideal!). Roll in sprinkles, nut products or coconut if desired. Place back on parchment paper and back again to the fridge for 10 minutes. Enjoy!

Feel absolve to layer the truffles in whatever you’d like. The calories currently are the chocolate coating.

To make them vegan, make sure to use vegan chocolates and a vegan chocolate protein powder.

These could keep for a couple days within the fridge.

21-Day time Vegan Kickstart -programs

In case you loved this post and you want to receive details with regards to how to roast turkey legs and thighs please visit our own web-site.


  • -

There are certain things that we all neglect. We easily forget how blessed we have been to have caring people inside our lives, to have good food on our plates, and to possess opportunities inside our upcoming. Little things like a simple discussion with a pal or an accept with someone you care about may seem to be there. We go through our day to day motions of buying overpriced cappuccinos and placing gas in our cars with out a believed. We hardly ever think about how privileged we truly are.

Tags : 

There are times when we also take ourselves for granted. We ignore what we love to do, those passions we all have, and obtain lost in the big globe for a moment or two. Frequently, we place our dreams apart because we’re afraid to fail. We neglect to say I really like you to those who matter. And sometimes, we just forget to end up being ourselves. Our quest for pleasure gets buried someplace.
And so before we talk about super amazing things with bacon and maple syrup, I thought I’d write you just a little inspirational post about how awesome you truly are. Because I think sometimes we all need a little reminder about the items we should never forget.
Remember you’re beautiful and unique. You are not like other people on the planet, so don’t actually try to become normal. Always, always be yourself. Embrace your quirks and weirdness. Be who you are and then you will find what you want.
Never forget to trust in yourself and the ones around you. That is life. We are all just getting along on our trip; figuring it out and acquiring those uphill fights one day at a time. In some way, we’re all attempting, so give compassion to people around you. Become encouraging to both yourself among others. Projecting kindness by no means feels bad.
Never forget to follow your dreams. Don’t be scared of failure, since it leads to achievement. Having a interest is daring, nonetheless it makes you uplifting and remarkable. Understand that part of life is pursuing a happiness. Ignore what others believe or say, follow what’s in your heart. Life is short and moments are always passing.
By no means settle. On like or in life. You deserve something amazing because you are amazing.
Okay, and you ought to probably never forget to consume your brussels sprouts either. With maple, bacon, and toasted hazelnuts. Hehe.
I know, I understand… eating brussel sprouts isn’t aside of the whole being awesome ordeal, however they do happen to be the best brussel sprouts I’ve available. Significantly you men… soooo good!
The flavors from the crispy bacon and sweet maple syrup… are you currently kidding? My home filled with the aroma of breakfast time and my mouth area just couldn’t obtain enough. Just a typical Wednesday… getting dramatic when describing food.
I can’t describe the mouth watering combination in a way that will truly seem sensible, however the brussel sprouts caramelize beautifully when finished. They were a tiny crisp externally from roasting within the oven, and the maple, bacon, and hazlenuts really produced them pop.
Ingredients
2 pounds brussels sprouts
3 slices of thick trim bacon trim diced into 1/2 inch cubes
1/4 cup chopped hazelnuts
Sea salt, to taste
Instructions
Preheat oven to 375 degrees F.
Wash brussel sprouts, cut off ends (main) and discard, then cut each sprout in half. Place brussel sprouts in large bowl, drizzle with 1 teaspoon of olive oil, sprinkle with a little bit of salt and pepper, and toss to evenly coat. Set aside.
Cook the bacon and hazelnuts in a big oven-proof skillet over medium heat before bacon starts to be crisp and hazelnuts become slightly toasted, about 4-5 minutes. Transfer the bacon and hazelnuts to some medium dish and reserve. Keep heat and add the brussel sprouts to the skillet. Drizzle maple syrup around brussel spouts and stir in skillet to evenly disperse within the sprouts. Cook brussel sprouts in pan for about 5 minutes or until they become a bit caramelized and get yourself a tiny golden dark brown.
Put pan in the oven and roast the brussel sprouts for about thirty minutes, the add the bacon and hazelnuts towards the pan with the brussel sprouts and roast on the subject of ten minutes longer or until sprouts are caramelized and fantastic. Add salt and pepper to flavor.
Donna

If you adored this short article and you would certainly like to obtain more info concerning roast turkey legs and stuffing kindly visit our own web page.


  • -

You guys know I’m a peanut butter lover forever. After all whoever thought of milling a nut into a marvelous spread is really a FREAKING genius!

Tags : 

Full frame of lightly roasted coffee beansI literally slather peanut butter about everything around the corner. I dream about it. I also awaken with peanut butter sandwiches next to my bed.
Yeah, don’t even ask.
Know very well what else I’m mind over heels in love with? Almond butter! It’s ridiculously clean and perfect on muffins, pancakes, and in chickpea blondies After making this vanilla bean honey almond butter, I simply don’t know if I can go back to the simple PB.
Almond butter is packed with nutritional benefits too; this includes fiber, protein, and good-for-you extra fat. I’m not sure about you, but I sort of want to dive encounter first in to the jar.
Anyway if you’ve under no circumstances made homemade almond butter, now could be time for you to start!
There are many easy steps:
1. Roasting the almonds within the oven to bring out the nuttiness
2. Control the almonds inside a food processor chip (sorry, no blenders).
3. Waiting a long time/wondering if it’s ever likely to become anything (it will!).
4. Adding additional tastes that you’d like after the almond butter is definitely creamy.
Once your almonds are roasted, you can place them in your meal processor and run it. After a minute or two, the almonds can look like fine sand (pictured above).
It’s very important to note that you should use a large meals processor with a pretty strong motor as it will be working for some time. I would recommend this food processor chip.
After about 10 minutes of working the food processor, the almonds will release their oils and be clumpy. This may take more time to access this point depending on your food processor chip. But don’t get worried, it’ll happen!
Clumpy means delicious things are approaching. All good things take time.
After several even more minutes, the almond butter will erase. You now could possibly be the judge of how creamy you prefer your almond butter. I like my almond butter VERY creamy, therefore i usually continue steadily to run my food processor chip until the almonds are blended until an almost liquid like regularity.
That is also when you’d want to include any extra flavorings. I love vanilla bean, a pinch of ocean salt, along with a little bit of honey. Nevertheless, you can include in chocolate chips, cinnamon, vanilla extract, maple syrup fundamentally whatever you can desire up.
Then you can place it within a mason jar or in a tubberware and cover; either will work. You don’t have to shop it within the refrigerator either. Just give it an instant stir before you use and it’ll become perfect.
All the picture below needs is chopped up bananas and some mini chocolates potato chips. Oh and probably a fresh manicure (reason my nail polish).
BENEFIT FROM THE NUT BUTTER!
Prep time:
2 mins
Cook time:
30 mins
Total time:
32 mins
Ingredients
1/8 teaspoon ocean salt
Preheat oven to 350 degrees F.
On large baking sheet spread out almonds and roast in oven for 10-12 minutes until slightly brownish. Be very careful not to burn the nuts.
Transfer to your food processor and procedure for 10-15 moments, scraping down the sides while necessary. At this point the almonds should start to clump jointly. Continue to procedure unless you reach the desired consistency. I always process until my almond butter is water like. If preferred add sodium, vanilla bean seeds, and honey and procedure once again for another minute.
Transfer to tubberware or mason jar and store at room temp or in refrigerator. If you shop at room temperature, simply give the almond butter a stir before you utilize it.
I cannot believe you’re cheating on PB! 🂠Kidding!
I love building my nut butters flavored…with anything from vanilla to bourbon to maple to graham crackers or butterscotch chips. I love your honey/vanilla bean twist. I bet it’s so excellent!
Like your recipes, incidentally ðŸ‚
Question: Offers anyone prepared jars of nut butter to continue pantry racks or have to they always be refrigerated. I plan to make several batches as family gifts.

If you cherished this report and you would like to obtain far more information concerning How To Roast Turkey Leg (Suncakemom.Tumblr.Com) kindly pay a visit to our own web page.


  • -

Stuff our face with Mexican goodness and guzzle skinny margaritas. Duh.

Tags : 

Don’t act like you are not intrigued with breakfast enchiladas. Psssstt… they’re healthful too! The people who taste tested these for me even accepted, buuuuttttt I have a feeling Paula Deen would not. Sorry Paula, we’re conserving our calorie consumption for margaritas.
Let’s not pretend with eachother for an instant. There is absolutely no pretending that we won’t chase down everything with alcoholic beverages come Saturday. Margaritas with breakfast time? Why not? it’s Cinco de Mayo and I enjoy pretend I’m Mexican! Come on, we know how this vacation works… and exactly how painful Sunday is likely to be.
Just forget about hangovers. Focus on a breakfast that gets you prepared for each day full of delicious chips and guac. Since Cinco de Mayo happens to be this Sunday (and because I favor a week full of celebrations), I decided to share this together with you a little early.
We had been considering breakfast time enchiladas for quite sometime. More like thinking about them every night. Anyway I decided to wrap the traditional huevos rancheros breakfast time (eggs + beans) into tortillas and load them with delicious business (also known as reddish colored sauce and avocados).
I’m really pleased with that decision because We now want to consume these everyday for the rest of my life. And I can do that because they just have about 230 calories per enchilada. Yes!
Let me break it down for you personally.
Whole wheat tortillas (because we’re healthy whole grain eating people, duh).
Fluffy scrambled eggs (with mostly protein packed egg whites).
Refried dark beans.
Low fat cheeeeeese.
Uhhhh may i just tell you that basically these enchiladas are made from the best stuff on earth?
This is the fun part. The delicious business.
We combine the things I dream of into the tortillas. Drizzle with Plenty of reddish sauce, and move them up tight. Time to play the oven and get ready for a tastebud party in less than 30 minutes.
Skinny Huevos Rancheros Breakfast time Enchiladas
6 whole wheat tortillas (I love low carbohydrate, or you could also use corn tortillas to create these gluten-free.)
2 whole eggs + 6 egg whites
1 may (16 oz) great crimson enchilada sauce
1 may (16 oz) refried dark beans
1/2 crimson bell pepper, diced
1/2 cup cilantro, chopped
3/4 cup low-fat cheese (I like colby jack or mexican)
Pinch of salt
Directions
Preheat oven to 350 degrees F. Combine refried beans, diced reddish colored peppers, cilantro, and jalapeno jointly in a big bowl; reserve. In a moderate bowl defeat your eggs jointly. Coat large skillet with non stay cooking squirt and add your eggs. Let eggs set throughout the edges, and then begin to mix every couple of seconds, until eggs are barely set but still fluffy. Sprinkle with a dash of salt and pepper. Remove from temperature and reserve.
Place your tortillas on a microwave safe plate and microwave for approximately 20 seconds. Next, layer 11×7 inch skillet with nonstick spray.
Next fill each tortilla the following way: pass on 1/4 cup of black bean mixture in the middle of every tortilla, add 2 heaping tablespoons of scrambled eggs, 1 heaping tablespoon of cheese, and 2 tablespoons of enchilada sauce. Move each tortilla up one by one and place seam side down within the cooking dish. You will end up with 6 tortillas.
Pour remaining enchilada sauce over the top from the rolled tortillas, then sprinkle remaining mozzarella cheese at the top. Bake 25 a few minutes. Let stand a couple of minutes, then sprinkle with extra cilantro, tomatoes, and avocados. Add 1 tablespoon of sour cream on top if desired.
Serves 6
You could certainly use all egg whites if desired to cut more calories in the recipe
These would also end up being delicious using a green chili enchilada sauce
To make gluten-free, use corn tortillas
Sugars 2g
Protein 10g
The Percent Daily Ideals are based on a 2,000 calorie diet, so your beliefs may change based on your calorie ideals here may possibly not be 100% accurate because the recipes haven’t been professionally evaluated nor have they been examined with the U.S. FDA.
I utilized to calculate the nutritional information

In the event you liked this short article and you desire to obtain details concerning recipes for turkey legs and wings generously pay a visit to the web-page.


  • -

Homemade Arrabbiata Sauce with Zucchini the only tomato sauce you’ll ever need

Tags : 

Confession of your day: I’m a complete enthusiast of mini foods because We consider them true treats! For example, my go-to snacks are bananas rolled in toasted almonds, grain cakes with cottage parmesan cheese and honey, or cereal with glaciers cold almond dairy. Oh and margaritas! Because those can be viewed as snacks, right?
Anyhow I’m getting back to the point here… I eat a lot of carbs, and that is a problem. Nevertheless, you guys, I simply ADORE nooks-and-crannies english muffins and fundamentally every flavor or Cheerios to ever hit the market (minus Dulce de Leche).
Raise your hands if I simply referred to you, too.
Surprisingly I’ve were able to stop buying both bread and cereal so now the only carb-like food lurking in my own cupboards is really a pack of rice cakes, low-carb tortillas, and apparently marshmallow creme, that i ate in the jar yesterday evening while you’re watching old episodes of Felicity.
I actually don’t know in the event that you know this but teenager drama through the 90s is incredibly stressful.
So this whole low-carb thing implies that I am forced to stop pasta and choose another thing to pair tomato sauce with. That is where spaghetti squash comes in helpful; it’s gluten-free, low-carb, and freaking delicious! Did you know that one cup of spaghetti squash only has 42 calories and 8 online carbs? I could actually eat platefuls from it!
The true star today isn’t the spaghetti squash though; it’s my homemade arrabbiata sauce – a spicy tomato marinara sauce with garlic and herbs. I was reading someplace that arrabbiato means irritated in Italian, which for me just translates into one mean, spicy marinara! It really is sensational, particularly when paired with backyard veggies.
I enjoy building homemade tomato sauce because I love knowing what elements are being used plus the flavors are always bold and fresh. I believed it would be fun to show you how I make my favorite sauce without canned ingredients so that you can enjoy it too! Trust me, as soon as you try this you will not go back.
Now obviously it isn’t tomato season, but this formula is good year round and wonderful to freeze. I purchase organic tomato vegetables from Entire Foods because I see them to become the best quality through the off-season, but they can be a little bit expensive so it’s up to you.
To start, the tomatoes have to be stewed. The simplest way to do this is by reducing a X into the top or bottom of each tomato.
After that bring a pot of drinking water to some boil, and prepare a large plate of ice water nearby.
Place the X’ed tomato vegetables within the boiling water for about 1 minute or before skin begins to peel and split off a bit. Remove them having a slotted spoon and place tomato vegetables immediately into the ice drinking water for another minute or two to awesome.
The tomatoes should be easy to peel at this point! I just use my hands.
Once peeled, slice the tomatoes in two and scoop away the seeds; after that chop tomato vegetables into chunks and place inside a bowl.
Yes, you will have a tiny mess but it is going to be worth it.
Up coming you’ll saute the garlic, vegetables, onions, and celery using a bit of olive oil. I like to use carrots too since it normally sweetens in the sauce a little, but you could certainly sub them with crimson peppers or omit entirely.
Following the veggies become a bit soft you’ll add your tomatoes and tomato paste. Oh and the million buck herbs.
Gosh I enjoy both smell and flavor of fresh basil in my sauces. And a lot of it too. Avoid being skimpy!
Finally you’ll add your red pepper flakes for the spice! After that bring the sauce to some boil and decrease warmth and simmer for about an hour. Over the last 15 minutes, I add cut zucchini. Va va voom!
Following the sauce is done simmering all you’ll need to do is puree it with a hand blender or even a food processor. I love my sauce a bit chunky so I don’t puree it totally; quite often I’ll simply puree fifty percent of the sauce and add extra vegetables to it for any chunky texture.
Ingredients
2 teaspoons essential olive oil
6 cloves garlic, chopped
2 huge carrots, peeled and diced
2 celery stalks, finely chopped
2 tablespoons tomato paste
6-8 basil leaves
Sea salt and freshly floor dark pepper, to taste
Instructions
Bring a large pot of drinking water to a moving boil over high heat. Sprinkle in a little bit of salt. Utilizing a blade, trim an X in to the end of each tomato. In a big bowl, add drinking water and snow. Place several tomatoes in to the boiling water for approximately 1 minute or unless you start to see the skins begin to peel off ever so somewhat. Remove them having a slotted spoon, and place in snow water for another minute or until cool. Repeat with staying tomatoes.
After the tomatoes are cool, remove from glaciers drinking water and use your fingers to remove your skin by simply peeling it back again from your X you created. After that slice and chop the tomato vegetables and place into another huge bowl until ready to cook.
In a large dutch oven or casserole pot, heat the olive oil over medium-high heat. Add the onions and garlic clove and saute before onions become translucent, about 6-8 minutes. Then add celery, carrots, and a sprinkle of sodium and pepper; saute until veggies are softened. Next add the tomatoes, tomato paste, basil, oregano, and chili pepper flakes and bring the sauce to a boil. Reduce temperature to medium-low and simmer uncovered for approximately 1 hour, stirring every 10 minutes or so. Over the last 15 minutes stir in zucchini.
After sauce is performed (the zucchini should be al dente), remove from heat and transfer half of the sauce to some blender or food processor. Try not to obtain the zucchini in the sauce you’re going to blend. Blend/process until smooth then add the pureed sauce back to the pan. Time of year with more salt and pepper then serve immediately.
If you want it is possible to freeze the sauce for up to 2 months in an airtight plastic material bag or container.
Sauce adapted from Clean Feeding on Magazine’s Everyday Marinara

If you are you looking for more info on how to cook roast turkey leg visit the web site.


  • -

Needless to say, with all of my cookie dishes there’s always a fascinating story on what they were crafted. That one is no different.

Tags : 

Each time I visit Tony, I’m always asked to make cookies. In fact I’m not sure if he asks me. Generally I just log off the aircraft and immediately have got a strong desire to garbage up the kitchen and bake EVERYTHING I could think about. So typical.
Honestly, I love being able to leave him special house baked goodies. Since we have been long distance, I always feel like cooking shows just how much I treatment. It’s like leaving a delicious small treasure behind and I’m secretly wishing that every period he enjoys a cookie, he’s considering how much I miss him.
Don’t you move your eyes. I can’t help it; I’m seriously the biggest romantic on the planet.
Back to the story….
So Tony and I are headed to this used bookstore we discovered and as usual I cannot constitute my mind about what I’m going to bake him before We leave. I had developed about 10 tips in my head with multiple twists. After that Tony starts throwing away my cookie video game with crazy demands. For example, he asked if I could make a Snickers bar into a cookie? Not really in fact stuff a Snickers right into a cookie, but create a Snickers cookie. I believe he has some kind of perception that I’m fundamentally a cookie queen or a baking wizard. Do you visit a lightening bolt on my head? No. But there might be a whisk.
I should stop with the jokes.
A few minutes later, Tony pointed out pistachios and We immediately knew that these cookies were likely to happen.
Here’s a little more information on these chocolate chunk magic bombs: They’re made with brown butter so the cookie dough is extra caramel-like and wealthy. The dark chocolate melts into the dough when cooked and forms large ooey-gooey puddles which i totally wish to dive in (easily was Polly Pocket). The pistachio put in a fine texture and a pleasant flavor. Oh and the coffee? It’s why is this cookie extraordinary. It is not overpowering, but merely divine. Mixing coffee and dark brown butter was something I should have done age groups ago.
I hope you get yourself a chance to try out these gems – they’re the type of cookies with slightly crispy edges and smooth middles. Tony phone calls them ‘THE Guy COOKIE’. I recommend taking pleasure in them with a latte.
xo!
Ingredients
1 cup unsalted butter
1 tablespoon instant coffee granules, such as for example Folgers Instant Coffee or Taster’s Choice
1 cup packed darkish sugar
½ cup granulated sugar
1 teaspoon baking soda
1 1/2 cups chocolates chunks
Instructions
Whisk together the flour, cooking soda, and salt in a bowl and set aside. Melt butter in a saucepan over medium heat. The butter will begin to foam. Be sure you whisk consistently during this process. After a couple of minutes, the butter will quickly brown on the bottom of the saucepan; continue steadily to whisk and remove from heat when the butter starts to brown and present off a nutty aroma. Instantly transfer the butter to some bowl to prevent burning up. Add espresso granules immediately and present it a mix. Set aside to awesome for 5-10 a few minutes.
With a power mixer, combine the butter and sugars until thoroughly blended. Defeat in the egg, yolk, and vanilla until combined. Add the dried out ingredients slowly and defeat on low-speed simply until combined. Gently fold within the pistachios and delicious chocolate chunks.
Wrap your dough in plastic cover and chill in the refrigerator for just one hour or put in place freezer for 20 minutes if you’re super eager.
Preheat the oven to 350 degrees F. Once dough is chilled, measure out 2 tablespoons of dough and move into a ball and place on cookie sheet making sure there is at least 2 inches aside on each cookie. Press down VERY slighly together with the dough, unless you wish fatter cookies then leave as is usually.
Bake the cookies 10-13 mins or until the edges of the cookies commence to turn golden brown. They’ll look a bit underdone in the middle, but will continue to cook once from the range. Great the cookies around the sheets at least 2 mins. Sprinkle with just a little sea salt if desired. Remove the cooled cookies from your baking sheets and transfer to a cable rack to awesome completely. Do it again with staying dough.

<img src="http://image.baidu.com/search/http:%5C/%5C/www.thespruceeats.com%5C/thmb%5C/na7hgzrpvdxcikgsrefapeyvkp8=%5C/2600×1731%5C/filters:no_upscale():max_bytes(150000):strip_icc()%5C/crispy-oven-fried-chicken-thighs-92016-57d062605f9b5829f411fda2.jpg" alt="crispy oven fried chicken thighs or legs these oven-fried02ch” style=”max-width:410px;float:left;padding:10px 10px 10px 0px;border:0px;”>If you cherished this article and also you would like to collect more info regarding roast turkey leg cooking time i implore you to visit our own internet site.


  • -

The Best Dark brown Butter Chocolate Chip Cookies You’ll Ever Eat

Tags : 

Brown Butter Chocolates Chip Cookies with dark brown sugar, two types of delicious chocolate chips along with a sprinkle of sea salt. These are, in fact, the BEST cookies you can ever eat.
I was sick of making homemade chocolate chip cookies which were overly crispy and flat, just like the Tollhouse version that’s boring as hell. What I needed was a chewy, delectable, melt-in-your-mouth middle that sent me to heaven in just one bite. However, I also preferred a slightly crispy edge that could hold jointly well upon dunking into a big glass of milk. You are feeling me? Cookie perfection ain’t easy!
Well it’s been over four years since I made these dark brown butter delicious chocolate chip cookies, and I figured that some fresh photos were as a consequence on your blog (with the help of a reminder to bake these cookies once you can!). They are my favorite.
And heck, who cares if indeed they aren’t healthy. What they’re is a special treat you can feel good about baking.
And so finally, here we have been. The Best Brown Butter Delicious chocolate Chip Cookies You’ll EVER eat!
The brown butter is exactly what really makes them so unique. The flavor profile is certainly nutty, nice, toasty and similar to a caramel hazelnut taste. In the event that you aren’t sure how to brown butter, you can make reference to my tutorial here Like I said, it’s a love story.
Why else are these cookies so damn dank?
The high DARK brown sugar ratio! Instead of doing a half and half proportion of regular granulated white glucose and brown sugar, I do mostly brown glucose. The brown sugars helps to keep the cookies softer and chewier in the middle, yet still allows for crispy, delicious sides. Normally I choose dark brown glucose because it has a tiny bit even more molasses within the flavoring, which once again, helps to attain an out of this world cookie.
The addition of greek yogurt! A tablespoon is certainly all you have to to at least one 1) help activate the cooking soda which means you obtain amazing crinkly-looking tops and 2) keep the dough moist and lovely. Not forget it.
Two types of chocolates chips! One milk and one semi-sweet. It really just creates more flavor profiles.
Chilled dough! Yes, this recipe requires you to chill the dough, but I promise it’s worthwhile. Chilling cookie dough allows the cookies to create a smooth caramel taste, with crispy brownish edges and a chewy interior. This is really because the fat within the formula (butter) is sound and the sugars also absorbs a few of it. Believe me!
These cookies are freezer friendly. Simply roll into dough balls and place in freezer-safe container for cooking later on. Once you’re prepared to enjoy, remove the dough ball and bake as directed. You may need to increase another minute or two to the baking period. Freezing cookie dough is definitely wonderful since it allows for part control or just for prepping forward when you yourself have guests or are tossing a party!
These cookies aren’t only epic, but additionally life-changing. Many of my close friends have cooked them time and time again, only to tell me that they’ll never make another chocolates chip cookie formula simply because this one is the best. If you appear back through the outdated post , you will see that these cookies receive rave evaluations. So essentially what I’m saying is that I know you’ll love my go-to chocolates chip cookie too.
I hope you enjoy these dark brown butter chocolates chip cookies as much as I love baking them. In the event that you make them label me on Instagram with #ambitiouskitchen so I can easily see your creation!
5.0 from 5 reviews
Ingredients
1 teaspoon baking soda
1/2 teaspoon of salt
1 1/2 cups packed dark brown sugar
1/4 cup granulated sugar
1 huge egg plus 1 egg yolk, at room temperature
2 teaspoons vanilla extract
Coarse sea salt, for sprinkling at the top
Instructions
Whisk jointly the flour, baking soda, and salt in a dish and reserve. Melt butter inside a saucepan over medium warmth. The butter will begin to foam. Be sure you whisk consistently during this process. After a short while, the butter will begin to brown on the bottom of the saucepan. Continue to whisk and remove from warmth as soon as the butter begins to brown and present off a nutty aroma. Instantly transfer the butter to some dish to prevent burning up. Reserve to awesome for 5-10 mins or until cool enough to touch.
With a power mixer, combine the brown butter and sugars until well combined, about 1 minute. Defeat in the egg, egg yolk, vanilla, and yogurt until mixed. Add the dry ingredients gradually and defeat on low-speed just until mixed. Fold within the chocolate chips.
Chill your dough for 2-3 hours within the refrigerator, or up to 12-24 hours. Usually do not try to speed up this process. The dough needs to chill!
Once dough is chilled, preheat the oven to 350 degrees F. You may want to obtain the dough and thaw it out a bit before measuring the dough if it’s super hard. This should consider about 20 mins. Once prepared to bake, measure 2 heaping tablespoons of the dough or use a moderate cookie scoop. It doesn’t need to be properly rolled. Place dough balls on cookie sheet, 2 in . apart.
Bake the cookies 9-11 mins or before edges of the cookies begin to convert golden brown. They will look a little underdone in the centre, but will continue steadily to cook once from the oven! Cool the cookies for the bedding for 5 minutes to allow them to set up, after that sprinkle each cookie with sea salt. Remove the cooled cookies in the baking bed linens and transfer to a cable rack to cool completely. Makes 24-36 cookies.

For those who have just about any questions regarding where in addition to the way to employ roast leg of turkey, it is possible to call us at the webpage.


  • -

LOW CARBOHYDRATE Eggplant Lasagna with the very best Turkey Meat Sauce + Burrata

Tags : 

6 years ago
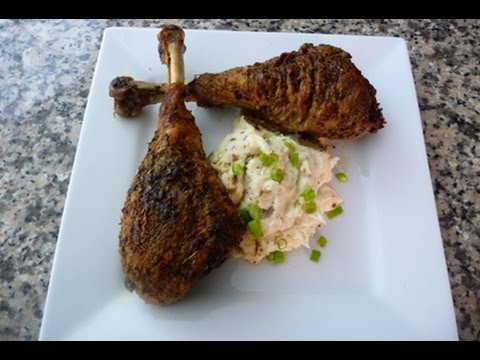
Lasagna without the noodles. It’s something in my existence. A very delicious thing which i needed to share with you just with time for eggplant season!
Let’s online backup a sec though. Before I talk about the recipe information with you, I must tell you about my lasagna obsession. Flashback to around my 21st birthday when I asked my Mom to make me lasagna. First of all, three days ahead of my birthday I had returned to America from my adventures wine consuming and touring around in the property of Oz, therefore my 21st birthday didn’t seem all that interesting.
On the other hand, my Mom was THRILLED. She wanted to make me something special for my birthday and asked for requests. I believe she was planning on me to state enchiladas (I usually request them), so when I asked for the vegetarian lasagna she was stunned. However, being the lovely mom she is, she ended up producing me the very best LASAGNA EVER. It was a giant 9×13 inch pan packed with spinach, butternut squash, mozzarella, parmesan and whole wheat grains noodles. I ate two pieces and refused to share with anyone else. Significantly refused. I kept the leftovers in my fridge and ate the rest every day for weekly.
This story would have to be shared because it’s what started my lasagna obsession. From that instant forward, I began remembering each and every time I ate lasagna. From the first time I met Tony’s parents to the last family Xmas party, I remember a lasagna.
And now we have this eggplant lasagna to remember! This particular formula is based off my no noodle zucchini lasagna , that is basically layer upon coating of zucchini, parmesan cheese, meat and sauce.
Oh me likey. Me likey a whole lot.
Eggplant lasagna could be my new favourite though, mostly because of the insanely good turkey meat sauce. OH MY GOD. Simply make the sauce and ladle it in the mouth area. (Or needless to say you may make the actual formula.) I am declaring this my popular turkey meat sauce. Hopefully you’ll agree.
Anyway allow me to quit jabbering and explain the complete lasagna process right here!
First we’ll produce the epic most famous Ambitious Kitchen turkey meat sauce. Yes, you’re going to placed on your fancy jeans and make your personal sauce. It’s a casino game changer in the lasagna world.
While that’s simmering up, you’ll bake the eggplant. I recommend peeling the eggplant after you bake it, or simply cut off the skin because it can be hard to lower through in the lasagna. As you can see I didn’t lower it off, but I noted within the things that you should.
After that’s done, you’ll execute a layer of meat sauce, eggplant, ricotta and burrata. The burrata makes factors incredibly creamy, but whether it’s not your thing, fresh new mozzarella is a superb substitute!
Bake until bubbly. Broil at the end to get the cheese at the top nice and golden brown. Drill down IN!
Recipe type: Grain Free of charge, Gluten Free, Italian, Low Carb, High Protein
Prep time:
20 mins
Cook time:
Ingredients
1/2 yellow onion, minced
3 garlic clove cloves, minced
1 (6 oz) may tomato paste
1/2 cup water
1 tablespoon dried oregano
1/4 teaspoon fennel seeds
1/8 teaspoon freshly ground black pepper
1 large eggplant, cut lengthwise into 1/4 inch slices (about 6-8 huge slices)
1 cup part skim ricotta
1 egg
Instructions
Preheat the oven to 375 degrees F.
Place essential olive oil a large dutch range or pot over medium high heat. Once oil is certainly hot, add in turkey, onion, bell pepper and garlic clove. Break up the turkey and cook for 5-8 mins or until turkey is no longer pink.
Next add in diced tomatoes, tomato paste, water, basil, dried out oregano, fennel seeds, salt and pepper. Mix until well mixed then reduce temperature to low, cover and simmer. Mix every short while.
Place sliced eggplant on large cooking sheet coated with non-stick cooking squirt. Sprinkle with salt and roast within the oven for 10-15 a few minutes to help dry out the eggplant a bit. This is a critical stage. After eggplant is performed cooking, remove or take off it’s skin.
While eggplant is cooking food, you can mix together the ricotta, parmesan and egg inside a medium bowl until well combined. Once eggplant is done cooking, take away the turkey meats sauce from the heat and allow to cool a bit. After they have cooled off for a few mins, add 1/2 cup of meats sauce towards the ricotta mixture.
To put together lasagna, spread 1/2 of the turkey meats sauce into the bottom of the 9×9 inch cooking pan coated with non-stick cooking spray. Place 1 / 2 of eggplant pieces evenly over meat sauce, spread on 1/2 of the ricotta combination, then break aside half of the burrata and drop on top (I simply cut up the burrata having a blade). Repeat levels again starting with the meats sauce, eggplant pieces and ricotta mix and finishing with burrata on top. Cover with foil and bake for 40 min. Remove foil and broil for 5-10 minutes or until parmesan cheese is golden brownish and bubbly on top. Serve with a side salad. Serves 6.

Here is more about roast turkey leg and breast stop by our own web-page.


  • -

As you might or may not have noticed, this past month I am trying to do my better to bring you even more savory meals. When I did my reader study last year, a lot of you wanted more healthy meal options.

Tags : 

But sometimes I simply can’t help but bake, I think it’s my true calling in life. The other day I put a 6am air travel out of Chicago to find out Tony. I knew I had formed to leave by 4am to be able to skip traffic and give myself enough time. You think that I would have went to bed at 8pm the night before, but nope, there I used to be cooking a batch of delicious chocolate chip cookies at midnight. I contact it stress baking. Some things hardly ever change.
Anyway I wish to take full advantage of this year’s farmer’s marketplace fruit therefore throughout summer I actually plan on getting you fresh, seasonal recipes… Maybe a fruit pie, or two?!
If you have ever gone to the Midwest, you understand how we love our strawberry rhubarb combos. The sweet and tartness can be all you could need, especially combined with a big scoop of vanilla glaciers cream.
What really makes this crisp stand out is the addition of vanilla and coconut glucose. The vanilla provides a lovely taste to the fruits that means it is unforgettable, I swear.
And the coconut glucose? Well it’s an unrefined sweetener that isn’t processed like regular glucose, meaning it provides more nutrients and minerals, along with adding a unique flavor. And no, it doesn’t taste like coconut. I would recommend giving it a try in the event that you haven’t, it’s one of my favorite sugars to bake with one of these days.
Finally, I love love love the pecan oat topping. While the crisp bakes, the pecans obtain all toasty, nutty and lovely. Perhaps it’s just me but I think pecans are perhaps one of the most underrated nut products out there. But who understands perhaps you aren’t a pecan enthusiast; if that’s so, feel absolve to sub in almonds.
I cannot wait for you to try out this one out on your family and friends, or simply eat it all yourself. This crisp is best served warm having a scoop of your favorite vanilla snow cream. Enjoy! Xo.
If you get this to, be sure to snap a pic and upload to Instagram using the hashtag #ambitiouskitchen! xoxo.
Lightened-up Vanilla Strawberry Rhubarb Crisp (vegan, gluten free of charge)
Prep period:
15 mins
Cook period:
30 mins
Total period:
45 mins
Ingredients
1/2 cup gluten free of charge oat flour
1 teaspoon cinnamon
3/4 chopped pecans
For the filling:
5 stalks rhubarb, diced into 1 inch pieces
1/2 cup coconut sugar
1/2 teaspoon vanilla extract
2 tablespoons gluten free oat flour
Instructions
Make the topping: Within a medium dish, whisk together oats, oat flour, cinnamon, pecans, coconut sugars and coconut oil; set aside.
Preheat oven to 375 degrees F. Grease a 9×9 in . baking pan with coconut essential oil (or generously coating with cooking squirt).
In a big dish, add coconut sugar, vanilla bean, strawberries, rhubarb and oat flour; toss several times to consistently coat the fruit with the glucose and flour. Pour into prepared pan and evenly sprinkle the topping over the fruit.
Bake for 30-35 minutes until the filling begins to bubble and the very best is golden brown. Cool for 10-15 minutes before serving. Top with your favorite snow cream, if desired. Serves 9.
It is possible to replace the oat flour with regular flour if you’re not really gluten free.
You can also use softened or melted butter in place of the coconut oil in the event that you aren’t dairy free.
You can even use brown sugar instead of the coconut sugar in the event that’s what you have on hand.
OH my goodness strain baking”. I can 100% relate. That’s me ALL the time! I will have a million thngs to do or a huge amount of cookies in my own wedding cake stand but sometimes baking is the only way to soothe the spirit.
Also this crisp is as well perfect for summer! Caring all your healthful attributes too, totally going to serve this with some ice cream for summer months bbqs!
Hi Monique,
This appears amazing and can’t wait to create it for the Xmas party this weekend. Can I make use of frozen berries for this? If yes, would I must thaw them first or just make use of them straight away?

If you beloved this article therefore you would like to get more info concerning roast turkey leg in oven generously visit our web site.


  • -

I’ve been obtaining back to vinyassa yoga lately. More often than not I do yoga exercise sculpt classes with weights, but recently I’ve needed some deep stretching and some major stress relief. The mind-body connection that yoga brings me is often times my personal favorite part of the course; I’m even more self-aware, compassionate, and thoughtful with each course. I’ve also noticed that my stress diminishes.

Tags : 

Last week my instructor was talking about how you have to be brave in order to become your true self. The way you have to exceed what you believe you’re with the capacity of if you wish to make something happen. Have a possibility on something or someone.
This last weekend I made a big batch of the summery salad (with fall flavors?) My mother came over to help taste check, and she totally adored it. We loved it cold offered with some greek yogurt.
This salad was inspired by my favorite little meal at Whole Foods made with couscous. Every time I’m there I seek out it.
This salad is filled with cranberries, pecans, along with a delicious honey orange dressing. Needless to say, you can even allow it to be vegan through the use of agave nectar instead of honey.
The toasted pecans and quinoa give it a good nutty flavor, however the dressing sweetens it up a little. It might be a pleasant light salad for any weekend picnic or matched with some salmon or poultry for a wholesome, well-rounded meal.
You need to the the quinoa marinate with the dressing within the refrigerator before serving. I would recommend adding the toasted pecans just before you’re ready to serve; this way they’ll stay nice and crunchy.
Don’t forget to label your creations with #ambitiouskitchen in Instagram. I really like seeing the meals you make!
xo!
Prep time:
25 mins
Total period:
25 mins
Ingredients
1 moderate orange, juiced
1 tablespoon honey or agave nectar
1/2 teaspoon tumeric
Instructions
Preheat oven to 350 degrees F. Place pecans on ungreased baking sheet and toast for 6-8 moments. Remove from oven and reserve to great. While they’re toasting you can begin cooking food your quinoa.
To cook quinoa: Wash quinoa with cold water in mesh strainer. Within a medium saucepan, provide 2 mugs of water to some boil. Add in quinoa and provide mixture to a boil. Cover, decrease warmth to low and allow simmer for quarter-hour or until quinoa provides absorbed every one of the drinking water. Remove from high temperature and fluff quinoa with fork; put in place large dish and reserve to cool for approximately 10 minutes.
To create dressing: Whisk collectively olive oil, apple cider vinegar, orange juice, orange zest, honey, tumeric, thyme.
Pour the dressing around quinoa and add cranberries. Mix to combine. Refrigerate for at least 30 minutes to allow tastes to absorb into quinoa. Add sodium and pepper to taste. Before serving fold in toasted pecans. Makes 5 servings; a little over 1/2 cup each.

Turkey Drumstick definition\/meaningIf you liked this report and you would like to receive more data regarding roasted turkey legs easy kindly visit our own site.


If you need us then send an e mail.